

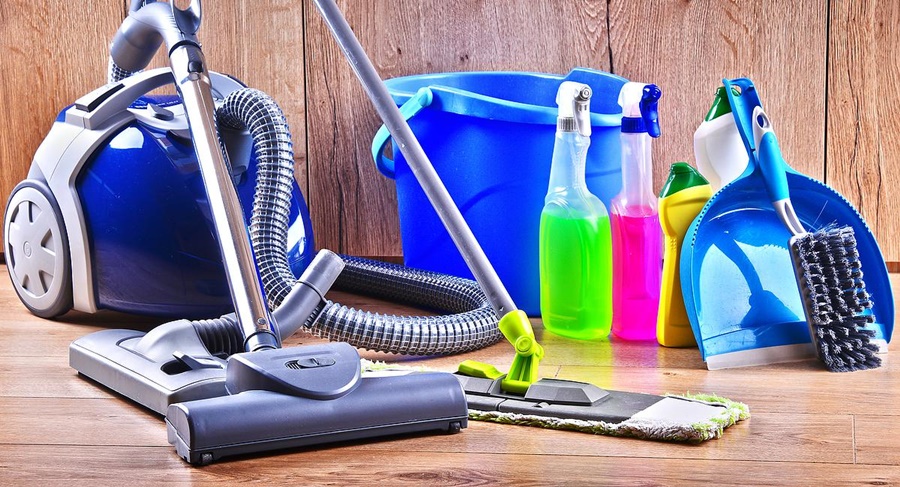
Keeping your vacuum cleaner in optimal condition is essential not only for maintaining indoor cleanliness, but also for ensuring the longevity of the appliance. A well-maintained vacuum can last for years, deliver stronger suction, and perform better in all areas of your home. Below is a comprehensive guide filled with expert-level vacuum cleaner maintenance tips that will help you get the most out of your machine.
Regular Vacuum Cleaner Maintenance: A Routine That Pays Off
Frequent upkeep ensures that your vacuum operates at peak performance. Without regular care, dust, hair, and debris can build up and clog filters, damage motors, and reduce efficiency.
🗓️ Weekly Tasks
- Empty the Dust Bin or Bag Regularly: Whether your vacuum is bagged or bagless, it’s essential to empty the container when it’s 2/3 full. Overfilled bins reduce suction power and strain the motor.
- Inspect the Brush Roll: Hair and string often wrap around the roller, hindering movement and effectiveness. Use scissors to gently cut away and remove debris.
- Check the Filters: Most vacuums come with HEPA or foam filters. A quick visual inspection each week ensures nothing is clogging the airflow.
Deep Monthly Maintenance for Peak Vacuum Cleaner Health
Once a month, go beyond the surface to ensure that all internal parts are functioning optimally.
Clean or Replace Filters
- Washable Filters: Rinse with lukewarm water and allow them to air dry for 24–48 hours before reinserting. Never install a wet filter.
- Non-Washable Filters: Replace them every 3–6 months depending on usage and manufacturer recommendations.
Examine Hoses and Connections
- Detach hoses and look through them for blockages. Use a broom handle or long stick to gently push out debris.
- Make sure no cracks or holes are present, as they reduce suction efficiency.
Tighten Screws and Components
Over time, the vibrations from regular use can loosen screws or parts. Inspect and tighten them as needed, especially near the roller and wheel assemblies.
Belt Maintenance: Keep the Power Going
The vacuum belt drives the brush roll and ensures it spins correctly. A worn or broken belt drastically affects performance.
- Inspect the belt monthly for signs of wear, cracks, or slack.
- Replace belts every 6–12 months, or sooner if they appear loose or stretched.
- Follow your manufacturer’s guide to remove the baseplate and replace the belt properly.
Proper Cleaning of Vacuum Attachments and Accessories
Attachments like crevice tools, dusting brushes, and extension wands also accumulate dirt and grime.
- Soak plastic parts in warm, soapy water, scrub lightly, and let them dry completely before reattaching.
- Use a can of compressed air to clean smaller nooks and crannies.
Tailored Maintenance Based on Flooring Type
Different floor surfaces affect how hard your vacuum has to work. Tailoring your maintenance routine to your home can extend the machine’s lifespan.
For Homes with Carpets:
- Use roller brushes more often and clean them weekly.
- Consider rotating the vacuum between high and low pile carpet settings to avoid overworking the motor.
For Homes with Hardwood or Tile:
- Use suction-only modes or soft brush rollers.
- Clean wheels regularly to prevent scratches on delicate surfaces.
Electrical Safety and Cord Care
Proper handling of the vacuum’s power supply enhances safety and reduces wear.
- Never yank the cord from the socket; instead, gently pull from the plug.
- Avoid running over the cord during vacuuming sessions.
- Inspect cords monthly for fraying or exposed wiring and replace if damaged.
Proper Storage Tips for Your Vacuum Cleaner
Where and how you store your vacuum affects its long-term condition.
- Store in a dry, cool place away from direct sunlight.
- Ensure the cord is wrapped loosely and attachments are placed in designated compartments.
- Never store a vacuum with a full dustbin or wet filters inside, as this causes mold and foul odors.
When to Consider Professional Servicing
Even with regular maintenance, it’s wise to have your vacuum professionally serviced annually—especially if it’s a high-end model or commercial-grade unit.
- Professional technicians can perform internal cleanings, motor diagnostics, and deep belt/filter servicing that regular users might miss.
- If your vacuum shows signs of reduced suction, burning smells, or unusual noises, a service check is recommended.
Choosing the Right Replacement Parts and Consumables
Using the right parts is crucial for keeping your vacuum running like new.
- Always choose OEM (Original Equipment Manufacturer) filters, belts, and bags when available.
- Generic parts may fit, but they often lack the durability and exact specifications your vacuum was designed for.
Track Your Maintenance with a Schedule
Staying organized helps extend your vacuum’s life and maintain performance.
| Task | Frequency |
|---|---|
| Empty Dustbin | After Each Use |
| Clean Brush Roll | Weekly |
| Wash/Replace Filter | Monthly |
| Inspect Belt | Monthly |
| Full Deep Clean | Quarterly |
| Professional Servicing | Annually |
Final Vacuum Cleaner Maintenance Checklist
✔ Empty bin or replace bag regularly
✔ Inspect and clean filters monthly
✔ Check and replace belt when worn
✔ Clear out hose blockages
✔ Clean attachments and accessories
✔ Store properly in a dry location
✔ Use proper techniques on each floor type
✔ Schedule professional servicing annually
Conclusion
Maintaining your vacuum cleaner is not just about preserving the appliance—it’s about ensuring your home stays clean, healthy, and dust-free with minimal effort. A vacuum that’s well taken care of will consistently deliver maximum suction power, filter out allergens effectively, and last for many years without costly repairs.


Leave a Reply